建立作者表單
本子文章展示瞭如何定義一個用於建立 `Author` 物件的頁面。
匯入驗證和清理方法
與 型別表單 一樣,要使用 `express-validator`,我們必須 `require` 我們想要使用的函式。
開啟 ** /controllers/authorController.js **,在檔案頂部(路由函式上方)新增以下行
const { body, validationResult } = require("express-validator");
控制器 - 獲取路由
找到匯出的 `author_create_get()` 控制器方法,並將其替換為以下程式碼。這將呈現 ** author_form.pug ** 檢視,並傳遞 `title` 變數。
// Display Author create form on GET.
exports.author_create_get = (req, res, next) => {
  res.render("author_form", { title: "Create Author" });
};
控制器 - 傳送路由
找到匯出的 `author_create_post()` 控制器方法,並將其替換為以下程式碼。
// Handle Author create on POST.
exports.author_create_post = [
  // Validate and sanitize fields.
  body("first_name")
    .trim()
    .isLength({ min: 1 })
    .escape()
    .withMessage("First name must be specified.")
    .isAlphanumeric()
    .withMessage("First name has non-alphanumeric characters."),
  body("family_name")
    .trim()
    .isLength({ min: 1 })
    .escape()
    .withMessage("Family name must be specified.")
    .isAlphanumeric()
    .withMessage("Family name has non-alphanumeric characters."),
  body("date_of_birth", "Invalid date of birth")
    .optional({ values: "falsy" })
    .isISO8601()
    .toDate(),
  body("date_of_death", "Invalid date of death")
    .optional({ values: "falsy" })
    .isISO8601()
    .toDate(),

  // Process request after validation and sanitization.
  asyncHandler(async (req, res, next) => {
    // Extract the validation errors from a request.
    const errors = validationResult(req);

    // Create Author object with escaped and trimmed data
    const author = new Author({
      first_name: req.body.first_name,
      family_name: req.body.family_name,
      date_of_birth: req.body.date_of_birth,
      date_of_death: req.body.date_of_death,
    });

    if (!errors.isEmpty()) {
      // There are errors. Render form again with sanitized values/errors messages.
      res.render("author_form", {
        title: "Create Author",
        author: author,
        errors: errors.array(),
      });
      return;
    } else {
      // Data from form is valid.

      // Save author.
      await author.save();
      // Redirect to new author record.
      res.redirect(author.url);
    }
  }),
];
**警告:** 永遠不要使用 `isAlphanumeric()` 驗證 *姓名*(如上所示),因為許多姓名使用其他字元集。我們在這裡這樣做是為了演示如何使用驗證器,以及如何將其與其他驗證器和錯誤報告連結。
此程式碼的結構和行為幾乎與建立 `Genre` 物件完全相同。首先,我們驗證和清理資料。如果資料無效,我們將重新顯示錶單,以及使用者最初輸入的資料和錯誤訊息列表。如果資料有效,我們將儲存新的作者記錄,並將使用者重定向到作者詳細資訊頁面。
與 `Genre` 後處理程式不同,我們在儲存之前不會檢查 `Author` 物件是否已存在。可以說我們應該這樣做,但就目前而言,我們可以擁有多個具有相同名稱的作者。
驗證程式碼演示了一些新功能
- 我們可以使用 `withMessage()` 指定如果前一個驗證方法失敗要顯示的錯誤訊息,將驗證器連結在一起。這使得在沒有大量程式碼重複的情況下提供特定錯誤訊息變得非常容易。js
[ // Validate and sanitize fields. body("first_name") .trim() .isLength({ min: 1 }) .escape() .withMessage("First name must be specified.") .isAlphanumeric() .withMessage("First name has non-alphanumeric characters."), // … ]; - 我們可以使用 `optional()` 函式僅在輸入欄位後執行後續驗證(這允許我們驗證可選欄位)。例如,下面我們檢查可選的出生日期是否為符合 ISO8601 的日期(傳遞的 `{ values: "falsy" }` 物件意味著我們將接受空字串或 `null` 作為空值)。js
[ body("date_of_birth", "Invalid date of birth") .optional({ values: "falsy" }) .isISO8601() .toDate(), ]; - 引數作為字串從請求中接收。我們可以使用 `toDate()`(或 `toBoolean()`)將它們轉換為適當的 JavaScript 型別(如上面驗證器鏈的末尾所示)。
檢視
建立 ** /views/author_form.pug ** 並複製以下文字。
extends layout

block content
  h1=title

  form(method='POST')
    div.form-group
      label(for='first_name') First Name:
      input#first_name.form-control(type='text', placeholder='First name (Christian)' name='first_name' required value=(undefined===author ? '' : author.first_name) )
      label(for='family_name') Family Name:
      input#family_name.form-control(type='text', placeholder='Family name (Surname)' name='family_name' required value=(undefined===author ? '' : author.family_name))
    div.form-group
      label(for='date_of_birth') Date of birth:
      input#date_of_birth.form-control(type='date' name='date_of_birth' value=(undefined===author ? '' : author.date_of_birth) )
    button.btn.btn-primary(type='submit') Submit

  if errors
    ul
      for error in errors
        li!= error.msg
此檢視的結構和行為與 ** genre_form.pug ** 模板完全相同,因此我們不再贅述。
**注意:** 一些瀏覽器不支援 `type="date"` 的輸入,因此您將無法獲得日期選擇器小部件或預設的 `dd/mm/yyyy` 佔位符,而是會獲得一個空的純文字欄位。一個解決方法是顯式新增 `placeholder='dd/mm/yyyy'` 屬性,這樣在功能較弱的瀏覽器上,您仍然會收到有關所需文字格式的資訊。
挑戰:新增死亡日期
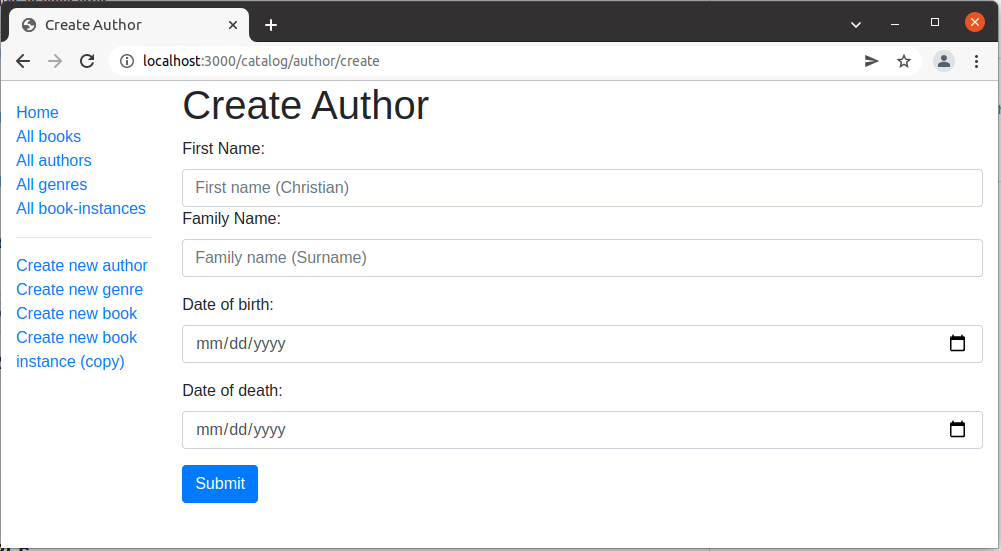
上面的模板缺少用於輸入 `date_of_death` 的欄位。按照與出生日期表單組相同的模式建立該欄位!
它看起來像什麼?
執行應用程式,在瀏覽器中開啟 `https://:3000/`,然後選擇 *建立新作者* 連結。如果一切設定正確,您的網站應該看起來像以下螢幕截圖。輸入值後,它將被儲存,您將被帶到作者詳細資訊頁面。
**注意:** 如果您嘗試使用各種日期輸入格式,您可能會發現 `yyyy-mm-dd` 格式行為不端。這是因為 JavaScript 將日期字串視為包含 0 小時的時
下一步
- 返回 Express 教程第 6 部分:使用表單。
- 繼續進行第 6 部分的下一篇文章:建立書籍表單。