Ember 應用結構和元件化
在本文中,我們將直接開始規劃 TodoMVC Ember 應用的結構,新增 HTML,然後將 HTML 結構分解成元件。
| 先決條件 |
至少,建議您熟悉核心HTML、CSS和JavaScript語言,並瞭解終端/命令列。 更深入地瞭解現代 JavaScript 特性(如類、模組等)將非常有益,因為 Ember 大量使用它們。 |
|---|---|
| 目標 | 學習如何構建 Ember 應用程式,然後將其結構分解成元件。 |
規劃 TodoMVC 應用的佈局
在上一篇文章中,我們設定了一個新的 Ember 專案,然後新增並配置了 CSS 樣式。現在,我們將新增一些 HTML,規劃 TodoMVC 應用程式的結構和語義。
應用程式的登入頁面 HTML 定義在 app/templates/application.hbs 中。它已經存在,其內容目前如下所示
{{!-- The following component displays Ember's default welcome message. --}}
<WelcomePage />
{{!-- Feel free to remove this! --}}

{{outlet}}
<WelcomePage /> 是 Ember 附加元件提供的一個元件,它渲染我們在上一篇文章中第一次導航到 localhost:4200 上的伺服器時看到的預設歡迎頁面。
但是,我們不需要它。相反,我們希望它包含 TodoMVC 應用程式結構。首先,刪除 application.hbs 的內容,並將其替換為以下內容
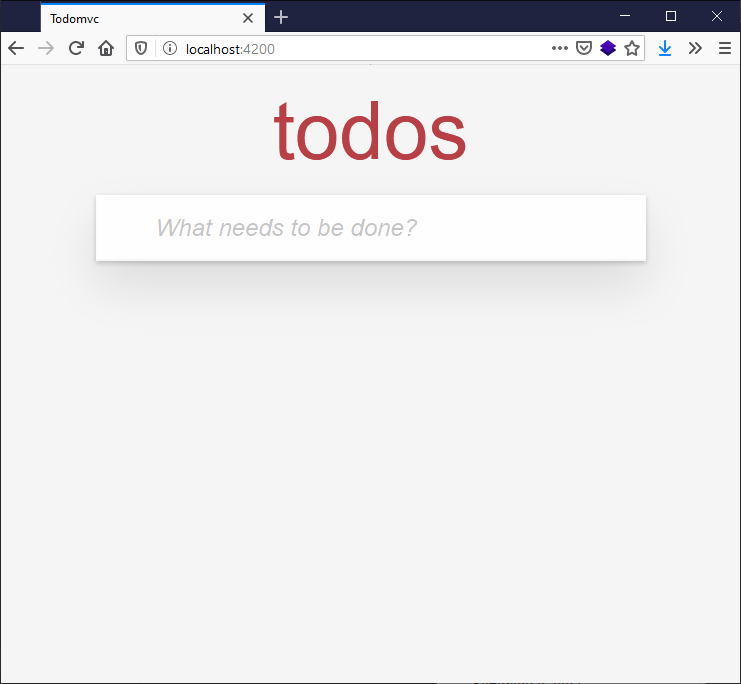
<section class="todoapp">
  <h1>todos</h1>
  <input
    class="new-todo"
    aria-label="What needs to be done?"
    placeholder="What needs to be done?"
    autofocus />
</section>
注意:aria-label 為輔助技術提供了一個標籤,以供使用 - 例如,用於螢幕閱讀器讀出。在以下情況下,這很有用:我們有一個 <input>,但沒有相應的 HTML 文字可以轉換為標籤。
儲存 application.hbs 後,您之前啟動的開發伺服器將自動重新構建應用程式並重新整理瀏覽器。渲染後的輸出應該看起來像這樣
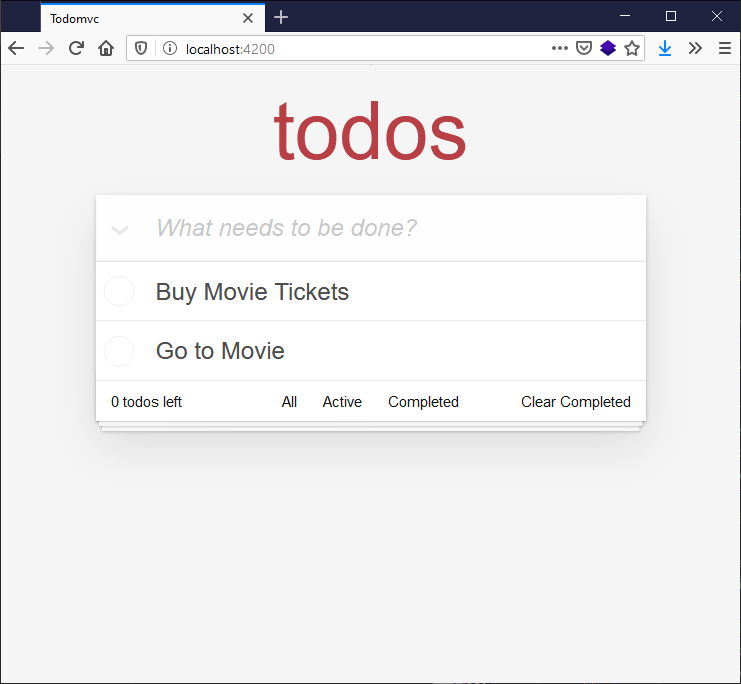
讓我們的 HTML 看起來像一個功能齊全的待辦事項列表應用程式並不需要太多努力。再次更新 application.hbs 檔案,使其內容如下所示
<section class="todoapp">
  <h1>todos</h1>
  <input
    class="new-todo"
    aria-label="What needs to be done?"
    placeholder="What needs to be done?"
    autofocus />

  <section class="main">
    <input id="mark-all-complete" class="toggle-all" type="checkbox" />
    <label for="mark-all-complete">Mark all as complete</label>

    <ul class="todo-list">
      <li>
        <div class="view">
          <input
            aria-label="Toggle the completion of this todo"
            class="toggle"
            type="checkbox" />
          <label>Buy Movie Tickets</label>
          <button
            type="button"
            class="destroy"
            title="Remove this todo"></button>
        </div>

        <input autofocus class="edit" value="Todo Text" />
      </li>

      <li>
        <div class="view">
          <input
            aria-label="Toggle the completion of this todo"
            class="toggle"
            type="checkbox" />
          <label>Go to Movie</label>
          <button
            type="button"
            class="destroy"
            title="Remove this todo"></button>
        </div>

        <input autofocus class="edit" value="Todo Text" />
      </li>
    </ul>
  </section>

  <footer class="footer">
    <span class="todo-count"> <strong>0</strong> todos left </span>

    <ul class="filters">
      <li>
        <a href="#">All</a>
        <a href="#">Active</a>
        <a href="#">Completed</a>
      </li>
    </ul>

    <button type="button" class="clear-completed">Clear Completed</button>
  </footer>
</section>
渲染後的輸出現在應該是如下所示
這看起來很完整,但請記住,這只是一個靜態原型。現在我們需要將 HTML 程式碼分解成動態元件;稍後我們將將其變成一個完全互動式的應用程式。
檢視與渲染的待辦事項應用程式相鄰的程式碼,我們可以選擇幾種方式來分解 UI,但讓我們計劃將 HTML 分成以下元件
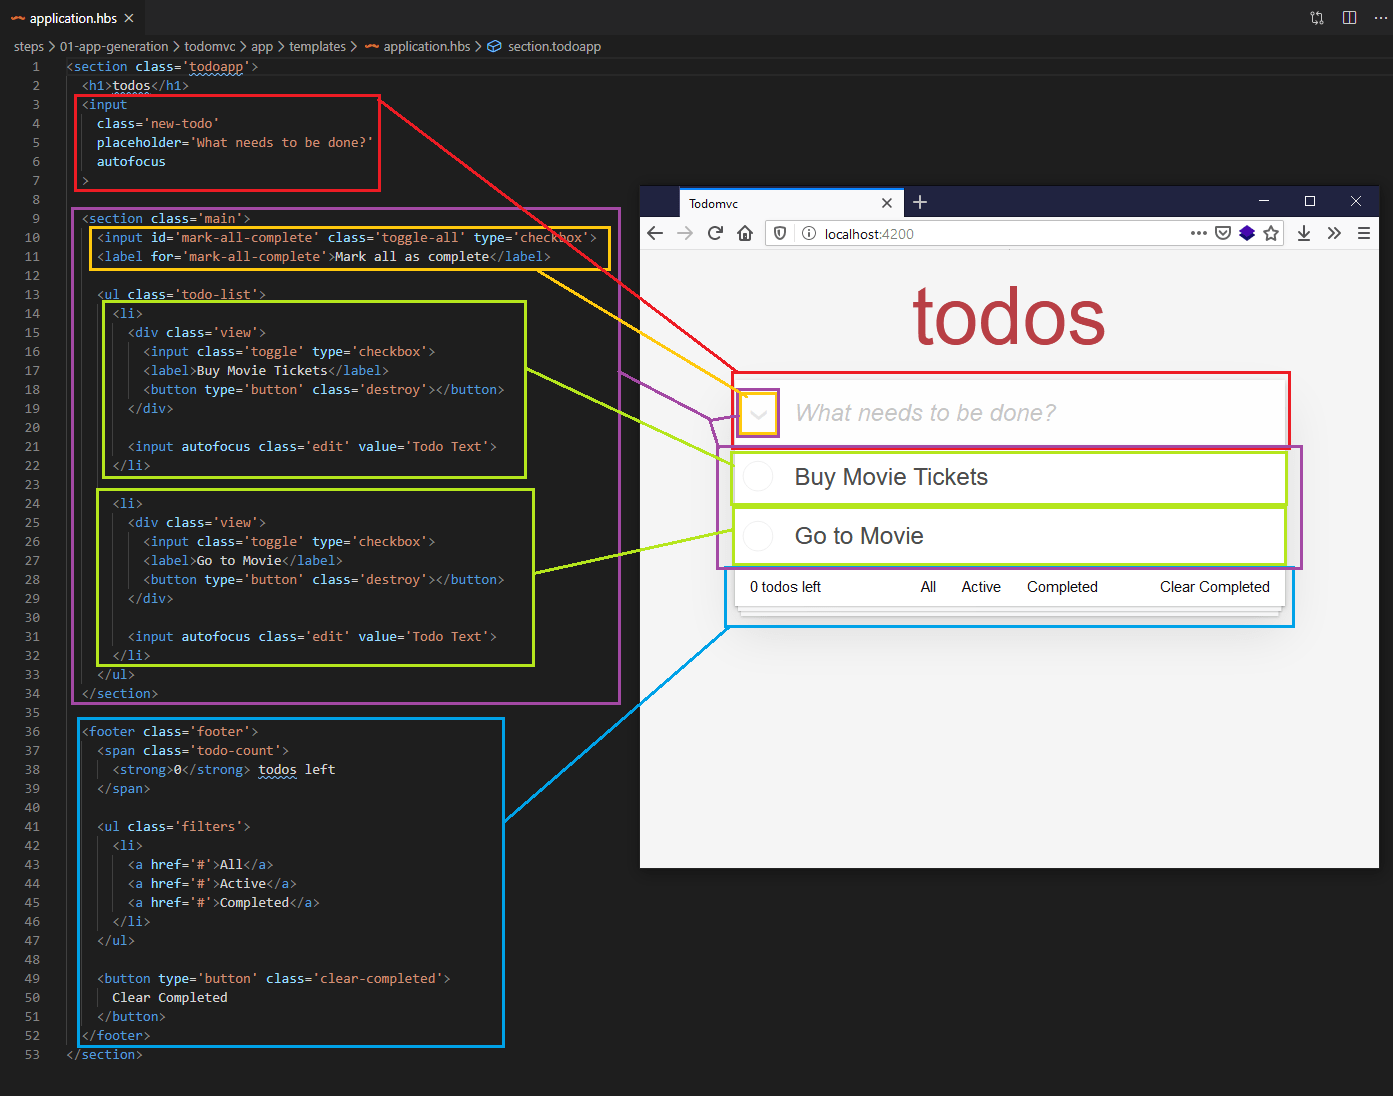
元件分組如下所示
- 主要輸入 / "new-todo"(影像中紅色)
- 待辦事項列表的包含主體 +
mark-all-complete按鈕(影像中紫色)mark-all-complete按鈕,出於下面給出的原因明確突出顯示(影像中黃色)- 每個待辦事項都是一個單獨的元件(影像中綠色)
- 頁尾(影像中藍色)
值得注意的是,mark-all-complete 複選框(以黃色標記),雖然在“main”部分,但渲染在“new-todo”輸入旁邊。這是因為預設的 CSS 使用負頂部和左側值絕對定位複選框 + 標籤,以將其移動到輸入旁邊,而不是將其放在“main”部分中。
使用 CLI 為我們建立元件
因此,為了表示我們的應用程式,我們希望建立 4 個元件
- 標題
- 列表
- 單個待辦事項
- 頁尾
要建立元件,我們使用 ember generate component 命令,後跟元件的名稱。讓我們先建立標題元件。為此
- 透過進入終端並按下 Ctrl + C 停止執行的伺服器。
- 在終端中輸入以下命令這些將生成一些新檔案,如生成的終端輸出所示bash
ember generate component headerinstalling component create app/components/header.hbs skip app/components/header.js tip to add a class, run `ember generate component-class header` installing component-test create tests/integration/components/header-test.js
header.hbs 是模板檔案,我們將包含該元件的 HTML 結構。稍後,我們將新增所需的動態功能,例如資料繫結、響應使用者互動等。
注意:header.js 檔案(顯示為已跳過)用於連線到後備 Glimmer 元件類,我們現在不需要它,因為它們用於新增互動性和狀態操作。預設情況下,generate component 會生成僅模板元件,因為在大型應用程式中,僅模板元件最終會成為大多陣列件。
header-test.js 用於編寫自動化測試,以確保我們的應用程式隨著時間的推移(例如,在我們升級、新增功能、重構等時)繼續工作。測試超出了本教程的範圍,儘管通常應該在開發時實施測試,而不是之後,否則很容易被遺忘。如果您對測試感興趣,或者想知道為什麼您可能想要進行自動化測試,請檢視官方 Ember 測試教程。
在我們開始新增任何元件程式碼之前,讓我們建立其他元件的腳手架。在終端中逐行輸入以下內容
ember generate component todo-list
ember generate component todo
ember generate component footer
您現在將在 todomvc/app/components 目錄中看到以下內容

現在我們已經擁有了所有元件結構檔案,我們可以將每個元件的 HTML 從 application.hbs 檔案中剪下並貼上到每個元件中,然後重新編寫 application.hbs 以反映我們新的抽象。
header.hbs檔案應更新為包含以下內容html<input class="new-todo" aria-label="What needs to be done?" placeholder="What needs to be done?" autofocus />todo-list.hbs應更新為包含以下程式碼塊html<section class="main"> <input id="mark-all-complete" class="toggle-all" type="checkbox" /> <label for="mark-all-complete">Mark all as complete</label> <ul class="todo-list"> <Todo /> <Todo /> </ul> </section>注意:此新
todo-list.hbs中唯一不是 HTML 的內容是<Todo />元件呼叫。在 Ember 中,元件呼叫類似於宣告 HTML 元素,但第一個字母以大寫字母開頭,並且名稱使用 駝峰式大小寫 編寫,如您在<TodoList />中所見。下面todo.hbs檔案的內容將替換渲染頁面中的<Todo />,因為我們的應用程式正在載入。- 將以下內容新增到
todo.hbs檔案中html<li> <div class="view"> <input aria-label="Toggle the completion of this todo" class="toggle" type="checkbox" /> <label>Buy Movie Tickets</label> <button type="button" class="destroy" title="Remove this todo"></button> </div> <input autofocus class="edit" value="Todo Text" /> </li> footer.hbs應更新為包含以下內容html<footer class="footer"> <span class="todo-count"> <strong>0</strong> todos left </span> <ul class="filters"> <li> <a href="#">All</a> <a href="#">Active</a> <a href="#">Completed</a> </li> </ul> <button type="button" class="clear-completed">Clear Completed</button> </footer>- 最後,
application.hbs的內容應更新為呼叫相應的元件,如下所示hbs<section class="todoapp"> <h1>todos</h1> <Header /> <TodoList /> <Footer /> </section> - 在完成這些更改後,再次在終端中執行
npm start,然後前往https://:4200,以確保待辦事項應用程式的外觀與重構之前相同。
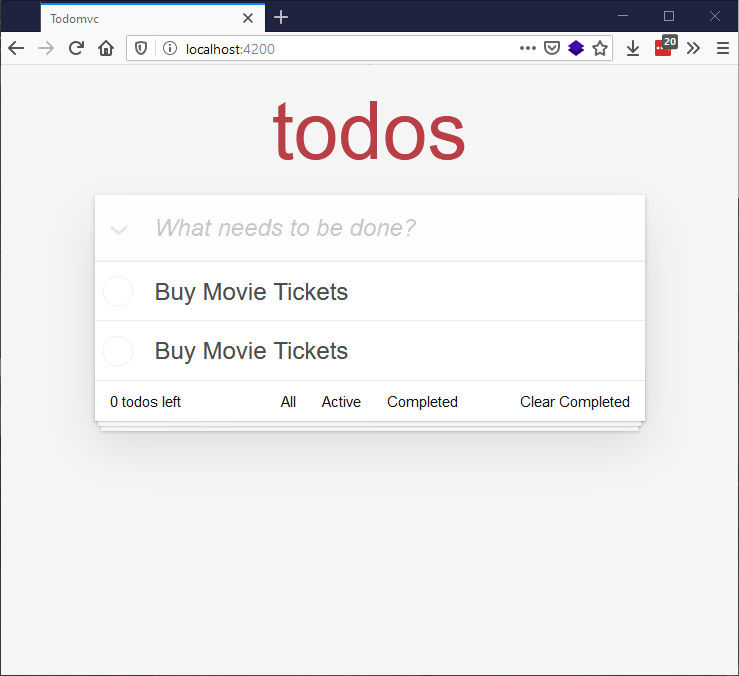
注意,待辦事項項都顯示為“購買電影票” - 這是因為同一個元件被呼叫了兩次,並且待辦事項文字被硬編碼到其中。我們將在下一篇文章中探討如何顯示不同的待辦事項項!