<input type="radio">
<input> 元素的 radio 型別通常用於單選按鈕組——描述一組相關選項的單選按鈕集合。
在給定的單選按鈕組中,一次只能選擇一個單選按鈕。單選按鈕通常呈現為小圓圈,選中時會被填充或高亮。
試一試
<fieldset>
  <legend>Select a maintenance drone:</legend>

  <div>
    <input type="radio" id="huey" name="drone" value="huey" checked />
    <label for="huey">Huey</label>
  </div>

  <div>
    <input type="radio" id="dewey" name="drone" value="dewey" />
    <label for="dewey">Dewey</label>
  </div>

  <div>
    <input type="radio" id="louie" name="drone" value="louie" />
    <label for="louie">Louie</label>
  </div>
</fieldset>
p,
label {
  font:
    1rem "Fira Sans",
    sans-serif;
}

input {
  margin: 0.4rem;
}
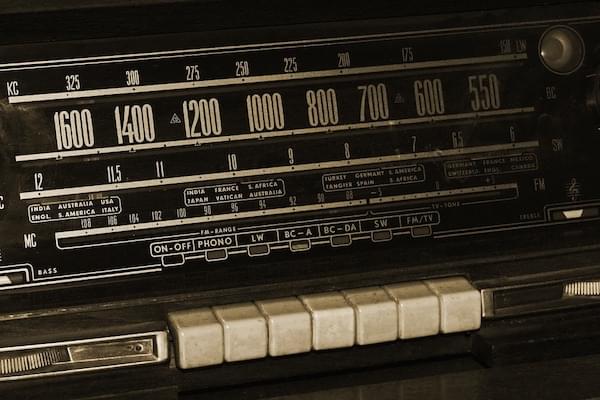
它們之所以被稱為單選按鈕(radio buttons),是因為其外觀和操作方式與老式收音機上的按鈕類似,如下圖所示。
備註: 複選框與單選按鈕類似,但有一個重要的區別:單選按鈕用於從一組選項中選擇一個值,而複選框允許你開啟或關閉單個值。當有多個控制元件時,單選按鈕允許從中選擇一個,而複選框允許多個值被選中。
值
value 屬性是一個包含單選按鈕值的字串。該值永遠不會被使用者代理顯示給使用者。相反,它用於標識一個組中哪個單選按鈕被選中。
定義一個單選按鈕組
透過為組中的每個單選按鈕指定相同的 name 來定義一個單選按鈕組。一旦建立了單選按鈕組,選中該組中的任何一個單選按鈕,都會自動取消選中同一組中任何當前已選中的單選按鈕。
你可以在一個頁面上設定任意數量的單選按鈕組,只要每個組都有自己唯一的 name。
例如,如果你的表單需要詢問使用者的首選聯絡方式,你可以建立三個單選按鈕,每個按鈕的 name 屬性都設定為 contact,但一個的 value 為 email,一個為 phone,另一個為 mail。使用者永遠不會看到 value 或 name(除非你明確新增程式碼來顯示它們)。
最終的 HTML 如下所示
<form>
  <fieldset>
    <legend>Please select your preferred contact method:</legend>
    <div>
      <input type="radio" id="contactChoice1" name="contact" value="email" />
      <label for="contactChoice1">Email</label>

      <input type="radio" id="contactChoice2" name="contact" value="phone" />
      <label for="contactChoice2">Phone</label>

      <input type="radio" id="contactChoice3" name="contact" value="mail" />
      <label for="contactChoice3">Mail</label>
    </div>
    <div>
      <button type="submit">Submit</button>
    </div>
  </fieldset>
</form>
在這裡,你可以看到三個單選按鈕,每個按鈕的 name 都設定為 contact,並且每個按鈕都有一個唯一的 value,用於唯一標識該組中的單個單選按鈕。它們每個也都有一個唯一的 id,<label> 元素的 for 屬性會使用它來將標籤與單選按鈕關聯起來。
你可以在這裡試用這個例子
單選按鈕組的資料表示
當上述表單在選中一個單選按鈕後提交時,表單的資料會包含一個格式為 contact=value 的條目。例如,如果使用者點選“電話”單選按鈕然後提交表單,表單的資料將包含 contact=phone 這一行。
如果你在 HTML 中省略了 value 屬性,提交的表單資料會為該組分配值 on。在這種情況下,如果使用者點選了“電話”選項並提交表單,得到的表單資料將是 contact=on,這沒什麼用。所以不要忘記設定你的 value 屬性!
備註: 如果在提交表單時沒有選中任何單選按鈕,那麼該單選按鈕組將完全不包含在提交的表單資料中,因為沒有值可以報告。
允許在未選擇任何單選按鈕組中的按鈕的情況下提交表單的情況相當少見,所以通常明智的做法是讓其中一個預設處於 checked 狀態。請參閱下面的預設選中一個單選按鈕。
讓我們在我們的例子中新增一些程式碼,以便我們可以檢查這個表單生成的資料。HTML 被修改為新增一個 <pre> 塊,用於輸出表單資料
<form>
  <fieldset>
    <legend>Please select your preferred contact method:</legend>
    <div>
      <input type="radio" id="contactChoice1" name="contact" value="email" />
      <label for="contactChoice1">Email</label>
      <input type="radio" id="contactChoice2" name="contact" value="phone" />
      <label for="contactChoice2">Phone</label>
      <input type="radio" id="contactChoice3" name="contact" value="mail" />
      <label for="contactChoice3">Mail</label>
    </div>
    <div>
      <button type="submit">Submit</button>
    </div>
  </fieldset>
</form>
<pre id="log"></pre>
然後我們新增一些 JavaScript 來在 submit 事件上設定一個事件監聽器,當用戶點選“提交”按鈕時會發送該事件
const form = document.querySelector("form");
const log = document.querySelector("#log");

form.addEventListener("submit", (event) => {
  const data = new FormData(form);
  let output = "";
  for (const entry of data) {
    output = `${output}${entry[0]}=${entry[1]}\r`;
  }
  log.innerText = output;
  event.preventDefault();
});
試試這個例子,看看 contact 組的結果永遠不會超過一個。
附加屬性
除了所有 <input> 元素共享的通用屬性外,radio 型別的輸入框還支援以下屬性。
checked-
一個布林屬性,如果存在,表示該單選按鈕是組中的預設選中項。
與其他瀏覽器不同,Firefox 預設會在頁面載入時保留
<input>的動態選中狀態。使用autocomplete屬性來控制此功能。 value-
value屬性是所有<input>共享的屬性;然而,它對於型別為radio的輸入框有特殊用途:當表單提交時,只有當前被選中的單選按鈕會被提交到伺服器,並且報告的值是value屬性的值。如果value沒有另外指定,它預設為字串on。這在上面的值一節中有演示。 required-
required屬性是大多數<input>共享的屬性。如果一個同名單選按鈕組中的任何一個單選按鈕有required屬性,那麼該組中必須有一個單選按鈕被選中,儘管不一定是應用了該屬性的那個。
使用單選輸入框
我們已經介紹了單選按鈕的基礎知識。現在讓我們看看你可能需要了解的其他常見的與單選按鈕相關的特性和技術。
預設選中一個單選按鈕
要讓一個單選按鈕預設被選中,你需要包含 checked 屬性,如前面例子的修訂版所示
<form>
  <fieldset>
    <legend>Please select your preferred contact method:</legend>
    <div>
      <input
        type="radio"
        id="contactChoice1"
        name="contact"
        value="email"
        checked />
      <label for="contactChoice1">Email</label>

      <input type="radio" id="contactChoice2" name="contact" value="phone" />
      <label for="contactChoice2">Phone</label>

      <input type="radio" id="contactChoice3" name="contact" value="mail" />
      <label for="contactChoice3">Mail</label>
    </div>
    <div>
      <button type="submit">Submit</button>
    </div>
  </fieldset>
</form>
在這種情況下,第一個單選按鈕現在是預設選中的。
備註: 如果你將 checked 屬性放在多個單選按鈕上,後面的例項會覆蓋前面的例項;也就是說,最後一個帶有 checked 的單選按鈕將被選中。這是因為一個組中一次只能有一個單選按鈕被選中,並且每當一個新的按鈕被標記為選中時,使用者代理會自動取消選中其他按鈕。
為你的單選按鈕提供更大的點選區域
在上面的例子中,你可能已經注意到,你可以透過點選其關聯的 <label> 元素以及單選按鈕本身來選擇一個單選按鈕。這是 HTML 表單標籤一個非常有用的特性,它使使用者更容易點選他們想要的選項,尤其是在像智慧手機這樣的小螢幕裝置上。
除了可訪問性之外,這也是在你的表單上正確設定 <label> 元素的另一個好理由。
驗證
對於設定了 required 屬性的單選按鈕,或者一個同名單選按鈕組中至少有一個成員設定了 required,那麼必須有一個單選按鈕被選中,該控制元件才被認為是有效的。如果沒有單選按鈕被選中,在驗證期間 ValidityState 物件的 valueMissing 屬性將返回 true,瀏覽器會要求使用者選擇一個選項。
為單選輸入框設定樣式
下面的例子展示了我們在本文中看到的例子的一個稍微更詳盡的版本,帶有一些額外的樣式,並透過使用專門的元素建立了更好的語義。HTML 如下所示
<form>
  <fieldset>
    <legend>Please select your preferred contact method:</legend>
    <div>
      <input
        type="radio"
        id="contactChoice1"
        name="contact"
        value="email"
        checked />
      <label for="contactChoice1">Email</label>

      <input type="radio" id="contactChoice2" name="contact" value="phone" />
      <label for="contactChoice2">Phone</label>

      <input type="radio" id="contactChoice3" name="contact" value="mail" />
      <label for="contactChoice3">Mail</label>
    </div>
    <div>
      <button type="submit">Submit</button>
    </div>
  </fieldset>
</form>
這個例子中涉及的 CSS 要多一些
html {
  font-family: sans-serif;
}

div:first-of-type {
  display: flex;
  align-items: flex-start;
  margin-bottom: 5px;
}

label {
  margin-right: 15px;
  line-height: 32px;
}

input {
  appearance: none;

  border-radius: 50%;
  width: 16px;
  height: 16px;

  border: 2px solid #999999;
  transition: 0.2s all linear;
  margin-right: 5px;

  position: relative;
  top: 4px;
}

input:checked {
  border: 6px solid black;
}

button,
legend {
  color: white;
  background-color: black;
  padding: 5px 10px;
  border-radius: 0;
  border: 0;
  font-size: 14px;
}

button:hover,
button:focus {
  color: #999999;
}

button:active {
  background-color: white;
  color: black;
  outline: 1px solid black;
}
這裡最值得注意的是 appearance 屬性的使用(需要字首以支援某些瀏覽器)。預設情況下,單選按鈕(和複選框)會使用作業系統的原生樣式來渲染這些控制元件。透過指定 appearance: none,你可以完全移除原生樣式,併為它們建立自己的樣式。在這裡,我們使用 border、border-radius 和 transition 來建立一個漂亮的動畫單選效果。還要注意 :checked 偽類是如何被用來指定單選按鈕被選中時的外觀樣式的。
備註: 如果你希望使用 appearance 屬性,你應該非常仔細地測試它。雖然它在大多數現代瀏覽器中都得到支援,但其實現方式差異很大。在舊版瀏覽器中,即使是關鍵字 none 在不同瀏覽器中的效果也不盡相同,有些瀏覽器根本不支援它。在最新的瀏覽器中,差異較小。
請注意,當點選一個單選按鈕時,隨著兩個按鈕狀態的改變,會有一個平滑的淡出/淡入效果。此外,圖例和提交按鈕的樣式和顏色被定製為具有強烈的對比度。這可能不是你在真實 Web 應用中想要的外觀,但它確實展示了各種可能性。
技術摘要
規範
| 規範 |
|---|
| HTML # radio-button-state-(type=radio) |
瀏覽器相容性
載入中…
另見
<input>和實現它的HTMLInputElement介面。RadioNodeList:描述單選按鈕列表的介面