
從 GitHub 無縫遷移到 GitLab:分步指南
如果您之前使用過眾多 CI/CD 工具之一,現在正在考慮切換到 GitLab,您可能會對遷移過程的難度感到好奇。在評估新解決方案時,遷移通常是 DevSecOps 團隊關心的問題。這是因為從一個系統遷移到另一個系統可能涉及大量工作、複雜性以及陡峭的學習曲線。我們在這裡告訴您,遷移到 GitLab 的 AI 驅動的 DevSecOps 平臺非常簡單。
在本文中,我們將一步一步地指導您完成整個過程。我們將透過我們 專案匯入 功能,講解如何從 GitHub 遷移到 GitLab。我們還將解釋如何手動將 GitHub Actions 遷移到 GitLab 管道。
可以從 GitHub 遷移哪些資料到 GitLab?
GitLab 內建的匯入器允許自動將 GitHub 專案遷移到 GitLab。您可以直接從 GitLab 的專案建立 UI 訪問此內建匯入器。在 UI 中,您可以選擇要遷移到 GitLab 的資料。可以遷移以下資料:
- 儲存庫描述
- Git 儲存庫資料
- 分支保護規則
- 協作者(成員)
- 問題
- 拉取請求
- Wiki 頁面
- 里程碑
- 標籤
- 釋出說明內容
- 釋出說明附件
- 評論附件
- 問題描述附件
- 拉取請求描述附件
- 拉取請求評審評論
- 常規問題和拉取請求評論
- Git 大型檔案儲存 (LFS) 物件
- 拉取請求評審
- 拉取請求指派的評審者
- 拉取請求“合併者”資訊
- 討論中的拉取請求評論回覆
- 拉取請求評審評論建議
- 問題和拉取請求事件
GitHub 和 GitLab 對同一概念使用不同的術語,因此在遷移過程中必須進行對映。例如,在遷移協作者或成員時,GitHub 的許可權將對映到相應的 GitLab 角色,如下所示:
| GitHub 角色 | GitLab 角色 |
|---|---|
| Read | Guest |
| Triage | Reporter |
| Write | Developer |
| Maintain | Maintainer |
| Admin | Owner |
以下是 GitLab 中對 GitHub 中某些術語的引用:
| GitHub 術語 | GitLab 術語 |
|---|---|
| Pull request | Merge request |
| 動作 | Pipeline |
將資料遷移到 GitLab 的先決條件
現在您知道了可以匯入什麼,讓我們回顧一下執行遷移的先決條件。使用 GitLab 匯入器,如果您滿足以下要求,可以從“GitHub.com”或“GitHub Enterprise”將專案匯入到“GitLab.com”或“自管 GitLab”:
- 您必須是您正在從中匯入 GitHub 專案的 GitLab 目標組的維護者 (Maintainer)。
- 儲存庫中的每個 GitHub 作者和指派者都必須在 GitHub 上擁有公開顯示的電子郵件地址,該地址應與其 GitLab 電子郵件地址匹配。
- GitHub 帳戶必須具有公開顯示的電子郵件地址。
- 必須在 GitLab 上啟用 GitHub 匯入源(僅在自管 GitLab 中)。
遷移使用者時,GitLab 使用 GitHub 中的公開顯示電子郵件地址來驗證具有相同電子郵件地址的 GitLab 使用者。由於電子郵件所有權是唯一的,GitLab 驗證有助於確認您已設定了具有有效許可權的有效使用者。
將資料從 GitHub 匯入 GitLab
讓我們一步一步地講解如何執行遷移。
我將遷移我的專案,即 Reddit sentiment analyzer,從 GitHub 到 GitLab。Reddit sentiment analyzer 包含一個拉取請求(在 GitLab 中稱為合併請求)、問題和評論。
注意: 雖然您可能無權訪問我的專案,但此分步過程適用於您擁有的任何專案。我使用我的專案是為了讓您在下一節中看到我如何遷移 GitHub Actions。
-
使用 專案建立介面 在 GitLab 中建立一個專案。
-
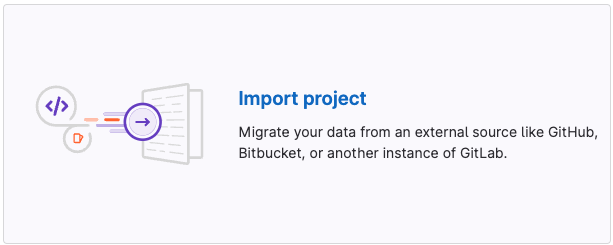
選擇“匯入專案”框。這使您可以從外部源遷移資料。
-
在“從...匯入專案”下,點選“GitHub”按鈕。這將帶您進入“使用 GitHub 進行身份驗證”頁面。
-
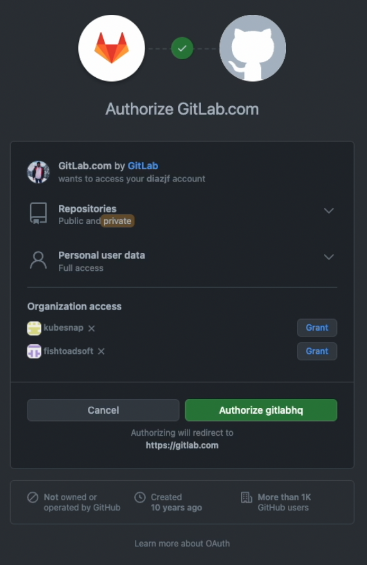
點選“使用 GitHub 進行身份驗證”按鈕。如果您願意,也可以指定一個具有“repo 範圍”的 GitHub 個人訪問令牌。這將帶您進入 GitHub 授權應用。在“授權 GitLab.com”頁面上,您可以授予對託管您要遷移的專案 GitHub 組織的訪問許可權。
-
點選專案所在的組織的“授予”按鈕。
-
點選“授權 gitlabhq”按鈕以授予 GitLab 對所選組織的訪問許可權。然後您將被帶到匯入選擇頁面。
-
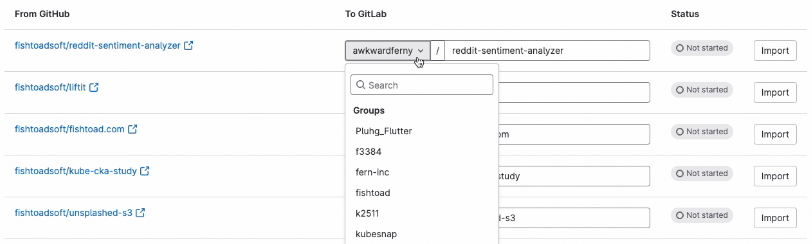
在這裡,您可以選擇要匯入的專案。

注意: 您選擇遷移的專案越多,匯入所需的時間就越長。
-
接下來,設定您希望將 GitHub 專案遷移到的 GitLab 位置。
-
點選“匯入”按鈕,匯入過程將開始。您可以在 UI 中看到進度。匯入完成後,狀態將更改為“完成”。
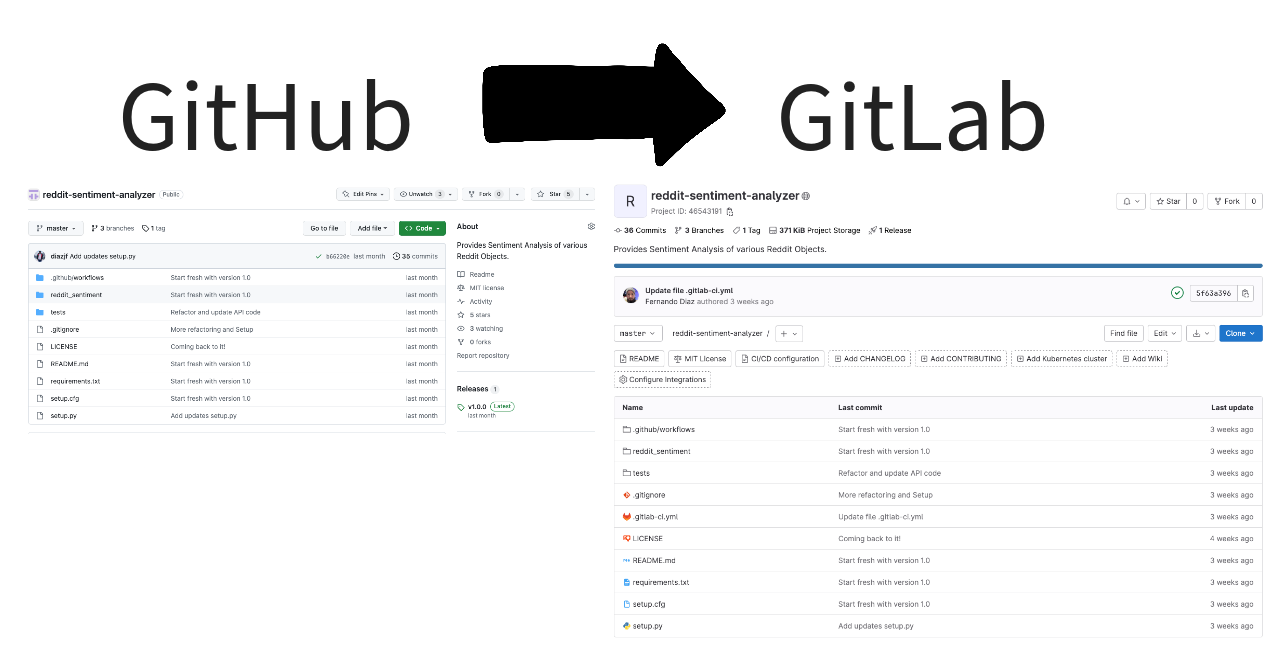
現在您的工作區應該已經有了匯入的專案。例如,我的專案位於 https://gitlab.com/awkwardferny/reddit-sentiment-analyzer。
檢查匯入的專案時,您會在 GitLab 上看到以下內容:
-
儲存庫遷移完成後
-
問題遷移完成後
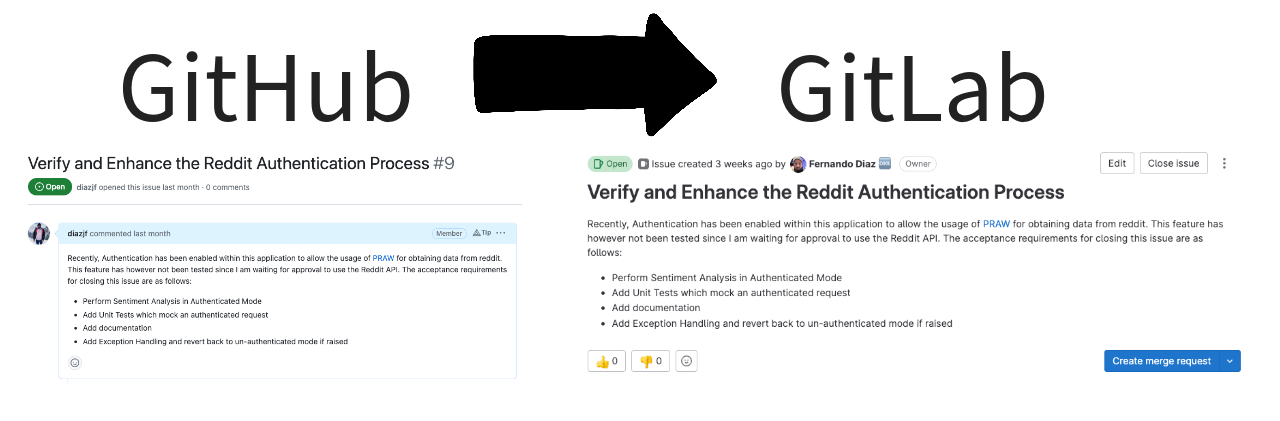
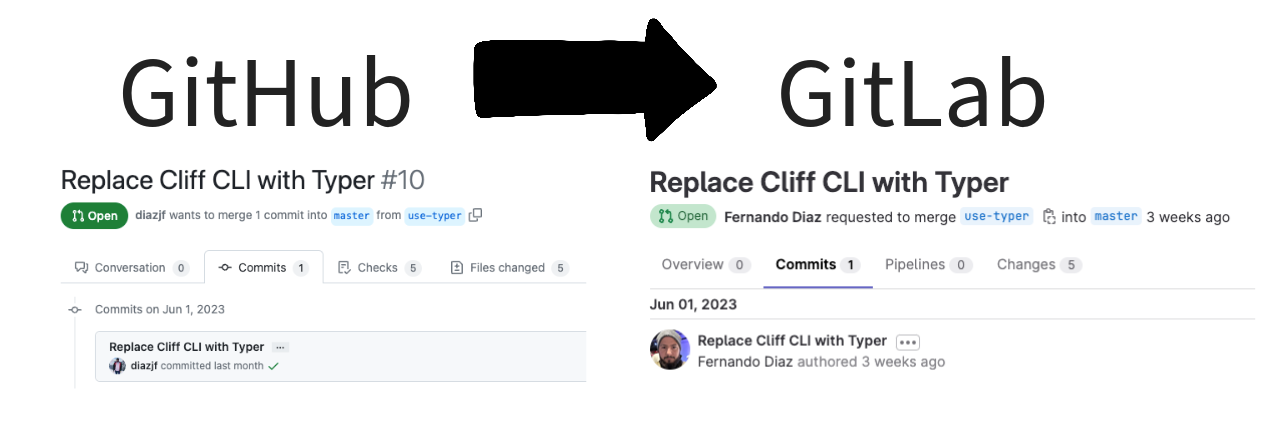
-
合併請求遷移完成後
將 GitHub Actions 遷移到 GitLab CI/CD
從 GitHub 遷移專案後,您會注意到沒有 GitHub Actions 在執行。不用擔心;手動遷移它們是一個簡單的過程。讓我們開始遷移 GitHub Actions 的過程。
-
檢查
.github/workflows資料夾中的 GitHub Actions。在您剛剛匯入的 專案中,您應該會看到三個 Action 檔案:lint.yml、smoke.yml和unit.yml。讓我們詳細瞭解這些檔案。-
lint.yml:此檔案包含使用 flake8 對原始碼執行 linting 的 Action。此 Action 使用python:3.10Docker 映像,並在執行 lint 之前安裝應用程式要求。yamlname: "Lint" on: push: branches: [master] pull_request: branches: [master] jobs: lint: runs-on: ubuntu-latest steps: - uses: actions/checkout@v3 - name: Set up Python 3.10 uses: actions/setup-python@v4 with: python-version: "3.10" - name: Install dependencies run: | python -m pip install --upgrade pip pip install flake8 pytest if [ -f requirements.txt ]; then pip install -r requirements.txt; fi - name: Lint with flake8 run: | # stop the build if there are Python syntax errors or undefined names flake8 . --count --select=E9,F63,F7,F82 --show-source --statistics # exit-zero treats all errors as warnings. The GitHub editor is 127 chars wide flake8 . --count --exit-zero --max-complexity=10 --max-line-length=127 --statistics -
smoke.yml:此檔案包含透過執行 CLI 幫助選單執行 smoke test 的 Action。它使用python:3.10Docker 映像,並在執行 smoke test 之前安裝應用程式要求。yamlname: "Smoke Tests" on: push: branches: [master] pull_request: branches: [master] jobs: smoke-tests: runs-on: ubuntu-latest steps: - uses: actions/checkout@v3 - name: Set up Python 3.10 uses: actions/setup-python@v4 with: python-version: "3.10" - name: Install dependencies run: | python -m pip install --upgrade pip pip install setuptools if [ -f requirements.txt ]; then pip install -r requirements.txt; fi - name: Install Sentiment Analysis Application run: | python setup.py install - name: Run smoke tests run: | reddit-sentiment --help -
unit.yml:此檔案包含使用 pytest 執行單元測試的 Action。它使用python:3.10Docker 映像,並在執行單元測試之前安裝應用程式要求。yamlname: "Unit Tests" on: push: branches: [master] pull_request: branches: [master] jobs: unit-tests: runs-on: ubuntu-latest steps: - uses: actions/checkout@v3 - name: Set up Python 3.10 uses: actions/setup-python@v4 with: python-version: "3.10" - name: Install dependencies run: | python -m pip install --upgrade pip pip install pytest if [ -f requirements.txt ]; then pip install -r requirements.txt; fi - name: Test with pytest run: | python -m pip install --upgrade pip if [ -f test-requirements.txt ]; then pip install -r test-requirements.txt; fi pytest tests/讓我們將這些 Actions 遷移到 GitLab。
-
-
轉到 GitLab 上最近匯入的專案,並開啟 Web IDE。
-
在根目錄建立一個名為
.gitlab-ci.yml的檔案。此檔案定義了 GitLab 管道。 -
新增以下配置,它將 GitHub Actions 作為作業新增到 GitLab 管道中。請注意描述每個部分的註釋。
yaml# This creates the stages in which the jobs will run. By default, all # jobs will run in parallel in the stage. Once the jobs are completed # successfully, you move on to the next stage. The way jobs run # is completely configurable. stages: - test # With the include statement, you can quickly add jobs that have # been pre-defined in external YAML files. The SAST job I've included below # is provided and maintained by GitLab and adds Static Application # Security Testing (SAST) to your pipeline. include: - template: Jobs/SAST.gitlab-ci.yml # This is the unit test job that does exactly what is defined in # the GitHub Action in unit.yml. You can see it uses the python:3.10 # Docker image, installs the application dependencies, and then runs # the unit tests with pytest. It was added with a simple copy and # paste and minor syntax changes. unit: image: python:3.10 stage: test before_script: - python -m pip install --upgrade pip - pip install pytest - if [ -f requirements.txt ]; then pip install -r requirements.txt; fi script: - pytest tests/ # This is the lint job that does exactly what is defined in the # GitHub Action in lint.yml. You can see it uses the python:3.10 # Docker image, installs the application dependencies, and then # performs the linting with flake8. It was added with a simple copy # and paste and minor syntax changes. lint: image: python:3.10 stage: test before_script: - python -m pip install --upgrade pip - pip install flake8 - if [ -f requirements.txt ]; then pip install -r requirements.txt; fi script: - flake8 . --count --select=E9,F63,F7,F82 --show-source --statistics - flake8 . --count --exit-zero --max-complexity=10 --max-line-length=127 --statistics # This is the smoke test job that does exactly what is defined in # the GitHub Action in smoke.yml. You can see it uses the python:3.10 # Docker image, installs the application dependencies, and then runs # the smoke tests with the Reddit sentiment analysis CLI. It was # added with a simple copy and paste and minor syntax changes. smoke: image: python:3.10 stage: test before_script: - python -m pip install --upgrade pip - pip install setuptools - if [ -f requirements.txt ]; then pip install -r requirements.txt; fi - python setup.py install script: - reddit-sentiment --help您可以看到在 GitLab 中執行的指令碼與 GitHub Actions 中的指令碼相匹配。主要區別在於設定作業和階段的語法。要了解更多關於如何建立和配置管道的資訊,請檢視 GitLab CI/CD 文件。
-
讓我們來提交程式碼。在 Web IDE 中,點選“原始碼控制”選項卡,這是側邊欄中從頂部數的第三個圖示。然後點選“提交”按鈕,選擇“繼續”,然後就大功告成了,您現在應該會有一個正在執行的管道。
-
檢查管道並確保作業正在正常執行。返回到您的專案,然後點選管道圖示。您可以看到我們建立的四個作業已執行。
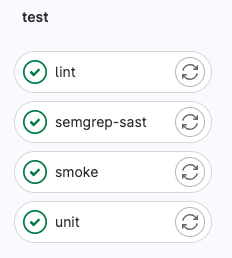
-
點選“unit”作業,您將看到單元測試已成功執行。
 $ pytest tests/
 ============================= test session starts ==============================
 platform linux -- Python 3.10.11, pytest-7.3.1, pluggy-1.0.0
 rootdir: /builds/awkwardferny/reddit-sentiment-analyzer
 collected 2 items
 tests/test_scraper.py ..                                                 [100%]
 ============================== 2 passed in 0.09s ===============================
 Cleaning up project directory and file based variables
 00:00
 Job succeeded
總結
將專案從 GitHub 遷移到 GitLab 最初可能看起來很困難。然而,正如本指南所示,這個過程遠非複雜。透過適當的規劃和遵循上述步驟,遷移到 GitLab 平臺可以順利而簡單。
這是 GitLab 的贊助文章。GitLab 是一個全面的基於 Web 的 DevSecOps 平臺,提供 Git 儲存庫管理、問題跟蹤、持續整合和部署管道功能。它有開源和專有版本,旨在覆蓋整個 DevOps 生命週期,使其成為尋求單一平臺來管理程式碼和操作資料的團隊的熱門選擇。